Author Topic: Shedbrewed #3  (Read 6191 times)

guest868

  • Guest
Shedbrewed #3
« on: February 16, 2010, 09:53:13 PM »
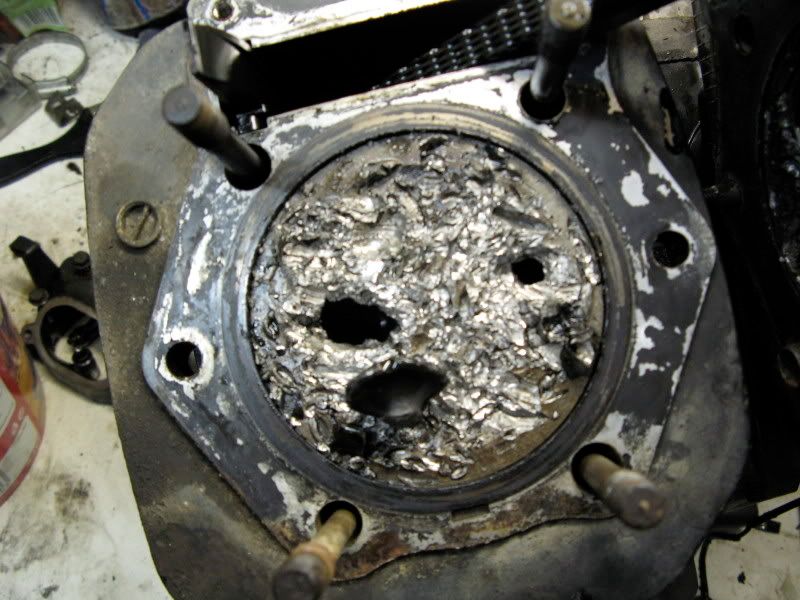
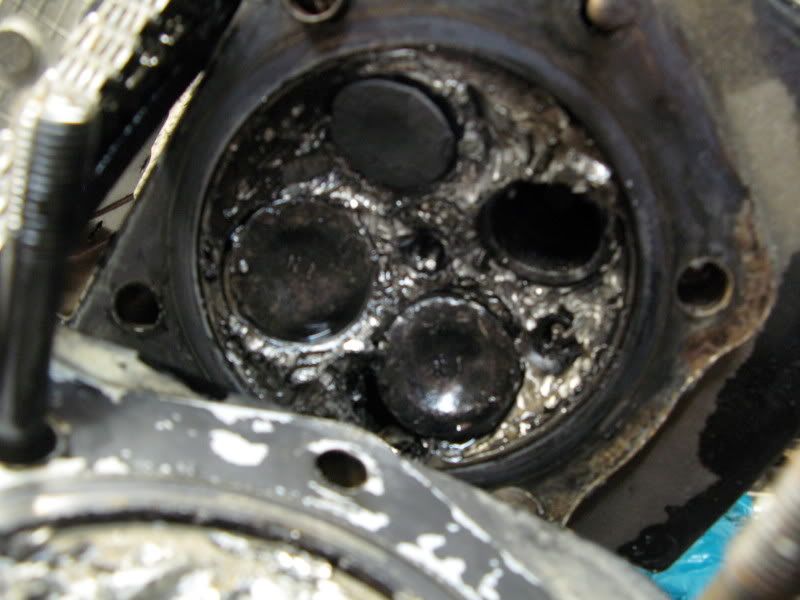
Quick history lesson, I lent a running DR600 out and it came back not running and with a now ex-mate.

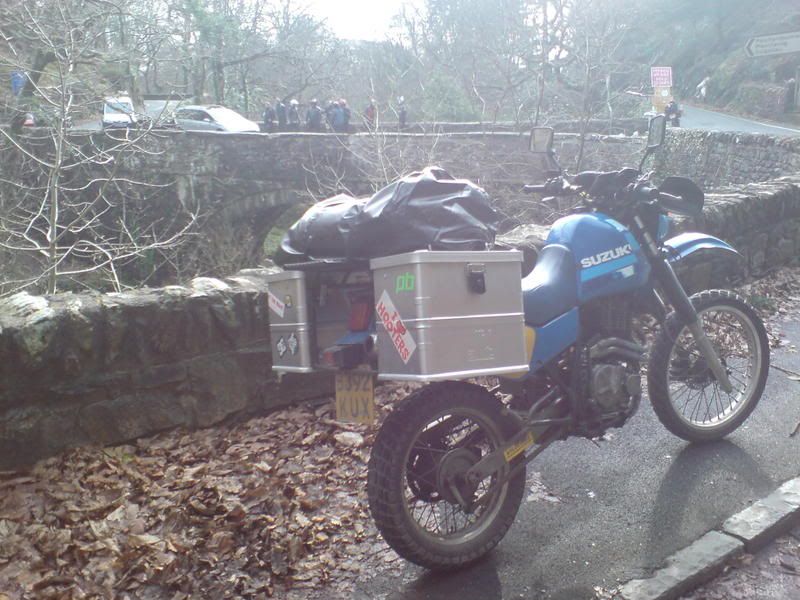
1985 DR600 that was in good working order-


Then got lent out and returned with engine internals looking like this-


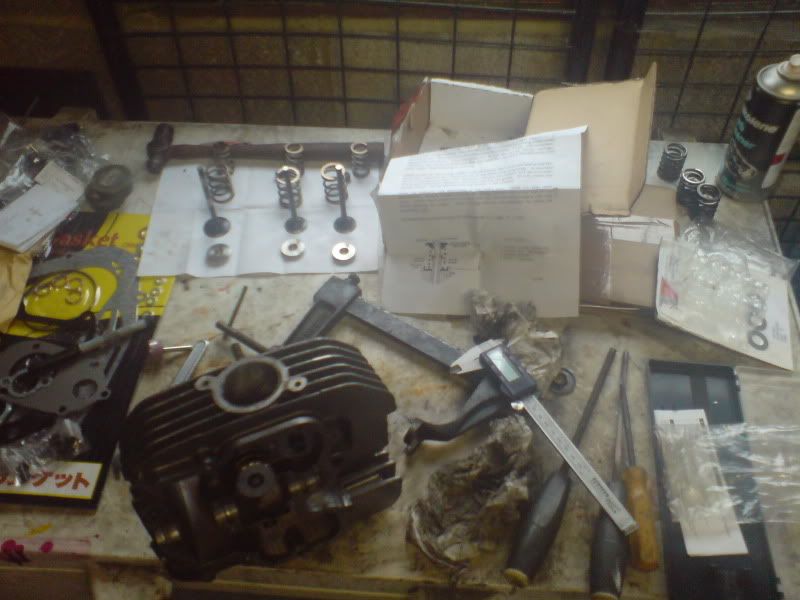
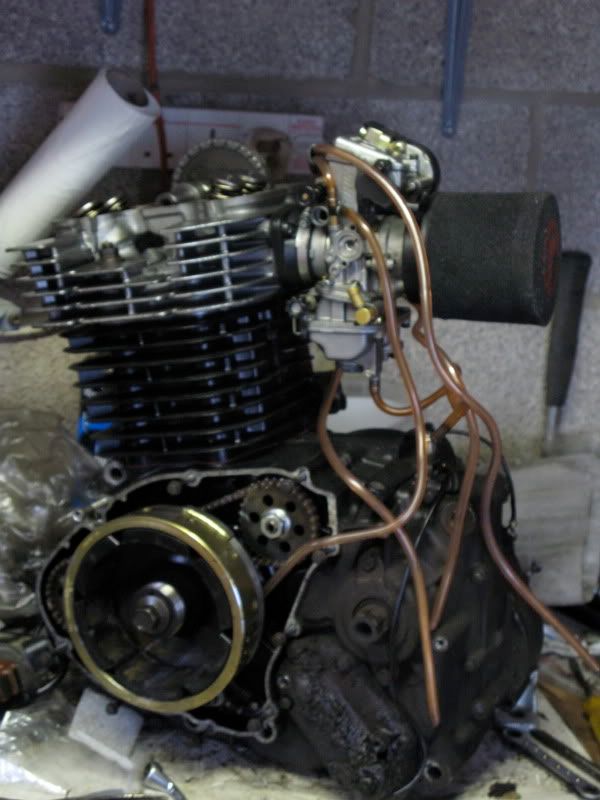
After a slow parts gathering and assembling the engine is back together-

Head assembly with R/D Ti valve spring kit-


Wiseco +3mm piston, necessary due to bore damage-


Assembled head in background, new balance chain-


The engine has been completed for some time now, but this is the only pic I can find-


Do you really want the spec?

+3mm rebore and Wiseco 97mm piston (620cc)
Joy #209 race grind cam
R/D Ti top valve set
Ported head
Polished and relieved rockers
Heavy duty clutch springs
Keihin FCR39 carb
Headers still to be made to adapted HRC design including reverse cone and Remus BSB ti silencer.

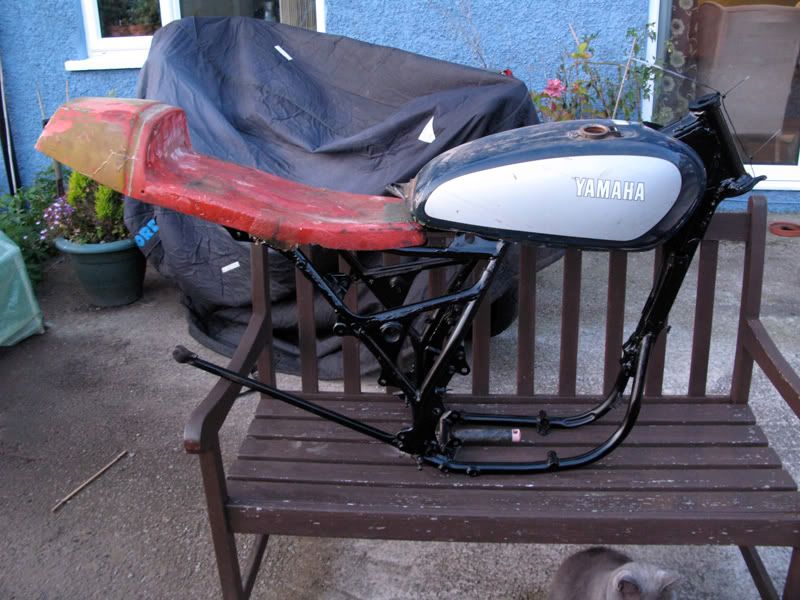
I had a little piece together with some parts in the shed-


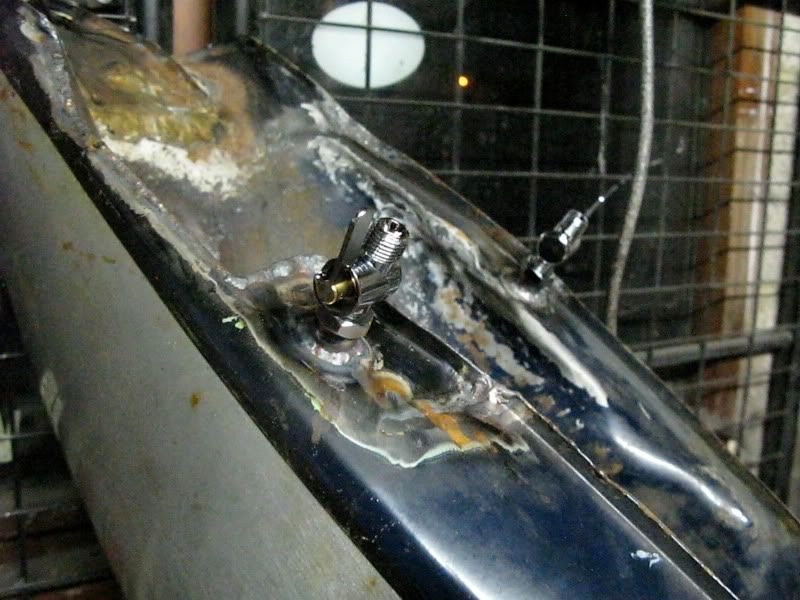
The SR500 tank got chopped about-


tap bungs fitted-


and a new filler bung fitted and then primed-


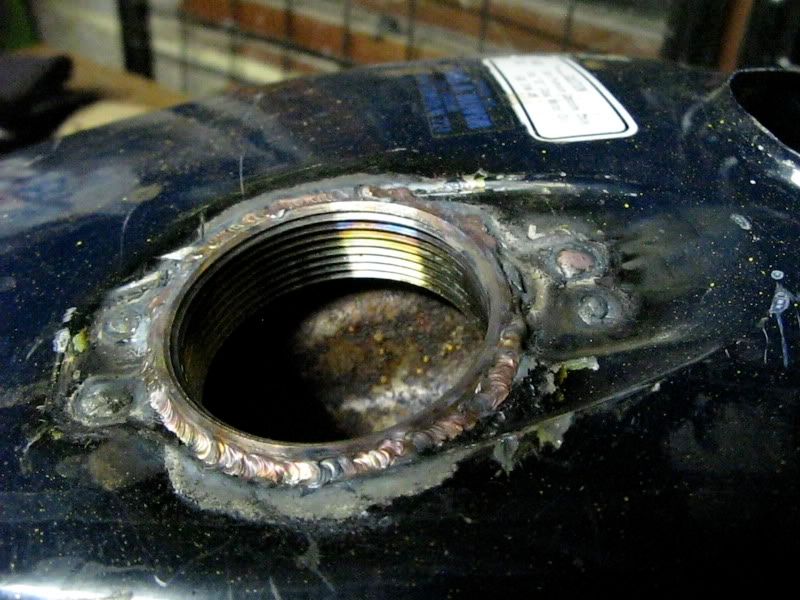
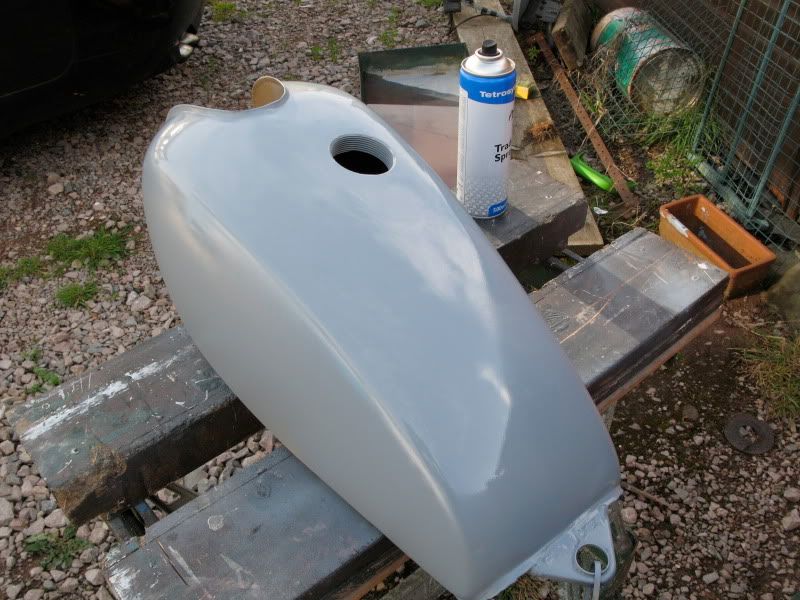
I regret priming the tank, and wish I'd just shellac'd the underside of the modified tank. Still, can't dwell on things.
I tried a few cheeky piece togethers-


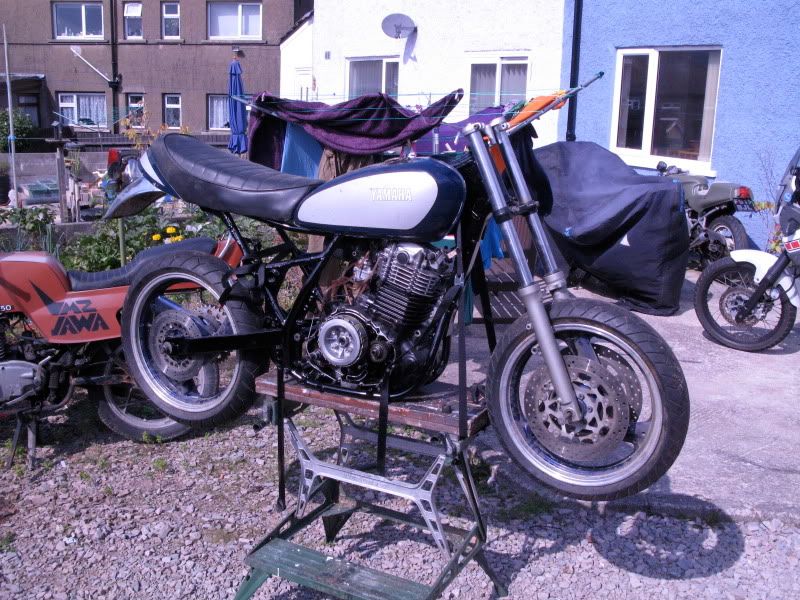
and then sort of lost interest until my mate Al dropped the new yoke off.
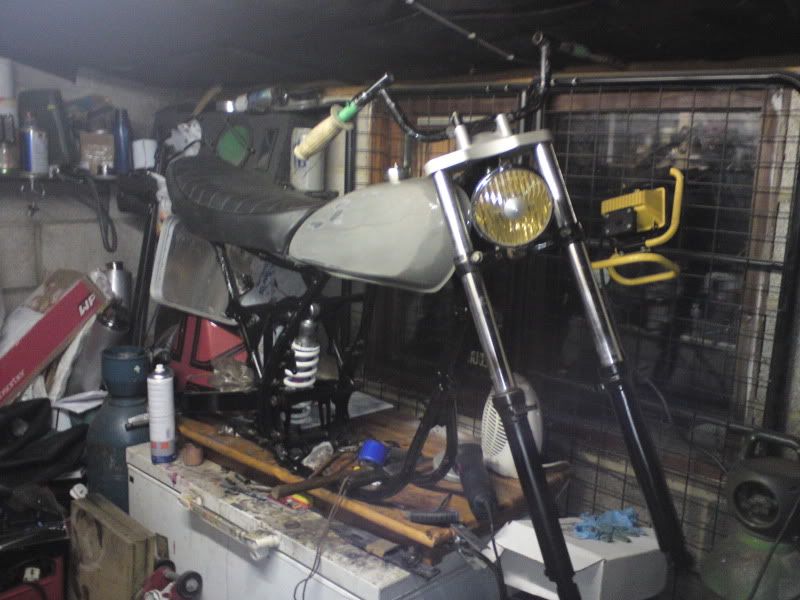
Been back out tonight after sourcing a new top head bearing and things are rolling again...


Tank colour is Ferguson Stoneleigh grey, but may change. Not sure. I am very much feeling a brown saddle though.

http://shedbrewed.blogspot.com/ for more updates when they happen, and other mutterings.

guest288

  • Guest
Re: Shedbrewed #3
« Reply #1 on: February 16, 2010, 10:10:02 PM »
That looks good, obviously very talented and have a good eye!

guest7

  • Guest
Re: Shedbrewed #3
« Reply #2 on: February 17, 2010, 12:00:56 AM »
Nice stuff, keep us posted

GC

guest868

  • Guest
Re: Shedbrewed #3
« Reply #3 on: February 19, 2010, 07:10:29 PM »
Well an early finish today (by 30mins) meant I got to spend some time titting about working on the bike. Now I have the awesome yoke from my mate I am able to get it on wheels which meant I could see how much I needed to drop the back end.
Conveniently I am able to just drill two holes in the stock llinkages to drop the back down, and Hagon have responded to my query regarding a firmer spring for the Hagon shock on the bike. So today was decision day, does it go Bratty, or does it go OE+?
Well it's going OE+.

The seat unit I tried looked fine, but was just a little too long, so can go back in the shed for the TR1. Some picamatures then-

From the rear-


From the front ish-


and then from the side with me trying to work out silencer position using some twine-


It is stupidly simple and unbelieveable how the SR rear guard fits, the bloody bolt holes couldn't line up better. I've got a list of jobs for tomorrow; I need to cut off and move the tank mounts, prep the tank for paint, locate the second spare SR sidepanel I have so I can extend them both, and also drill the top yoke to mount the instruments. Thankfully my mate has given me a couple of pilot holes already for that.
Chuffed.

guest868

  • Guest
Re: Shedbrewed #3
« Reply #4 on: February 20, 2010, 07:04:24 PM »
Well, I didn't get as much time to work on the bike today as planned, but I still managed to get the grinder fired up for some cutting action. I cut the stock tank mount and moved it back to allow the SR tank to line up. Something I'd been hoping for also happened; the bolts allow the SR seat to lock in place at the front. Happy days.


Was good to get back to welding, even though it's not as neat as I'd like. I took the chance to grind off the stock welds that were messy as well, and run some tig beads into it.
Next step was to sort the filler bung. Al had lathed down the BSP bung for me, and taken some of the excess thread off, but it was still too proud of the tank. I marked up and cut about 1/4 inch off before rewelding the two parts. I also welded my breather (s/s bleed nipple) and wings onto the bung. A quick polish and I'm pretty happy.


Next things that need attention are the front tank mounts, the lock stops (oh yes I'm going back in time for them, get guessing) and the rear master cylinder mount.

guest7

  • Guest
Re: Shedbrewed #3
« Reply #5 on: February 21, 2010, 10:48:28 AM »
 :o You talented sod!  ;)

GC

guest40

  • Guest
Re: Shedbrewed #3
« Reply #6 on: February 22, 2010, 01:57:47 AM »
I'll back up GC on that one, wow. and only 1 bike lifter too plus a freezer, a BBQ, a workmate(still working the logistics on that one) and a park bench... did I miss any? Brilliant!

guest868

  • Guest
Re: Shedbrewed #3
« Reply #7 on: February 22, 2010, 03:43:05 PM »
You can never have too many bike stands Kurt!  ;D
Yesterday was a mixed day, spent a lot of time staring at the bike in various guises.


but decided to go with what I'd set out to do. I managed to drill the frame for the tank front mounts. Albeit in the wrong place. Never mind will have to redrill in the right place.


After fannying about staring at the bike for far too long and umming and ahhing I setled for what I'd planned and snapped a few pics.


Meh.

guest868

  • Guest
Re: Shedbrewed #3
« Reply #8 on: February 22, 2010, 09:45:17 PM »
Fogranger


I love a good wet lay


guest7

  • Guest
Re: Shedbrewed #3
« Reply #9 on: February 22, 2010, 10:27:27 PM »
Tell us more about that top yoke, it looks the bollocks.

GC

guest868

  • Guest
Re: Shedbrewed #3
« Reply #10 on: February 23, 2010, 09:07:37 AM »
When I started this project I looked at building a 600 version of the 450 motos - http://450moto.com/ as a wonder as to what could be done with older bikes for some track fun. I had a front and rear end of an FZR600 3HE in the shed from an earlier abandoned TR1 project I was building for a mate (he welched and bought a flip light Kat), and they nearly went onto the SR500 I built, but time, or lack of it meant otherwise.
Whilst the front end fitted in well enough, there wasn't enough ground clearance left with the forks as stock. I ummed and ahhed about the various ways of dealing with the problem, including slugging the forks, or getting longer stanchions made. I had a brainwave about using a stepped top yoke to lift the front end, and after talking it over with my friend Al (who has access to edgecam, CNC machines and lathes) he said he would make me a stepped yoke to my sketches. There were tweaks along the way, including the lovely way the bottom bar clamp is located into the yoke, and the smooth front. It turned out very nice indeed.
How's that?

guest7

  • Guest
Re: Shedbrewed #3
« Reply #11 on: February 23, 2010, 11:21:55 PM »
Cheers for that, it's a nice bit of kit and an elegant solution to the problem.

GC

guest868

  • Guest
Re: Shedbrewed #3
« Reply #12 on: March 13, 2010, 05:07:01 PM »
It's been a day of painting. Some good,some not so good. For some reason the candy concentrate separated in the gun and left me with flecks of solid. Two options; carry on with a dark coat of candy, or bin the candy off and blow some other flat colour on. I stuck with the candy, but I'm not that happy with it.


Still got to flat back and clear coat once it's cured.

turkeyuk

  • Guest
Re: Shedbrewed #3
« Reply #13 on: March 13, 2010, 05:50:38 PM »
Nice work, im after a threaded weld in filler bung to fit a monza cap, where abouts did you get it? cheers, Paul.

guest868

  • Guest
Re: Shedbrewed #3
« Reply #14 on: March 13, 2010, 07:02:30 PM »
Nice work, im after a threaded weld in filler bung to fit a monza cap, where abouts did you get it? cheers, Paul.

2" BSP female socket welded into tank, 2" male BSPT bung turned to round from hex. Will see if I can find where I got it from. Was about £15 for the pair I think.